My cotton fabrics had a second soak in the wood ash solution. I added more hot water; rubbed the pillow cases; waited until the ash settled and the solution clearer; scooped the ash (and whatever else) at the top again; I let the fabrics fall gentle onto the water. After a while, any portion of the fabric poking above the water was pushed back with my back-scrub-brush handle.
.JPG)
These fabric pieces will be left to dry overnight; the solution has been discarded; ash dispersed on my soon-to-be garlic patch. I don't know if I will repeat the process another day or just leave the fabrics to cure until November.
I applied gesso to the pink curtain fabric. I got the product on the left from Ronette, but the same art supply shop got me the product on the right. Ronette's clear gesso (the jar is empty; it, too, was white in the jar,) was nicer to apply, probably because it was more pliable, whereas mine dried too quickly, leaving little dry bits on the brush; it also smelled stronger. However, my product seems to dry crispier, having more of a starch effect on the fabric.
.JPG)
I can't see clear gesso while applying, after applying, or after drying; I have to feel it to find out where I can draw. Mind you, clear gesso is not really clear. The cover of my sketchbook looks like this now, with the wee dry blob!
.JPG)
Coffee dye was even more... crude. Because I was using my cooking utensil and working in the kitchen, before I remembered I was dealing with wool, I was stirring and agitating like nobody's business. After letting it boil, (because I was working with the ash solution at the same time!) I simmered the lot for 40 minutes, and then left it to stand for a couple of hours.
The yarns looked as I expected; they are the tiny bits sitting on top of the original cones. I can think of many ways to weave with the two grays and then overdye to produce attractive two-value cloths.
.JPG)
(In real life, the lighter cones are darker than they appear here. On my screen, the color of my name at the bottom of the cone is closer to the yarn color.)
The shibori/dye experiment gave me much to think about. The sample pieces were woven in 2006, I think, with a merino warp and merino/mohair weft, both yarns around 110/2 or 2/16 woven at 18 EPI; the structure is shown in the the top draft
here. Here are some of my thought:
1) I never know when wet-finish is to take place in the weave-stitch-dye process; today, I did it at the very end while rinsing out the coffee. I must remember to be careful while the cloth is in the dye.
2) The bottom sample was stitched with lots of little shapes; the top, obviously, with two large shapes; with wool fabric of this size/configuration, larger shapes work better.
3) The woven samples have:
a) a contrast in the sheen and dye take-up in weft vs warp yarns,
b) a weave structure meant to show off the above contrast, and
c) shibori stitching, i.e. undyed and dyed areas.
More experimentation is required to find out when there is an overkill of various elements, (i.e. when all the elements yield diminishing returns). In today's case, the larger shapes most definitely worked better in showing something of the weave structure.
.JPG)
Area in pink shows the start of the warp, where I wove a little bit of plain weave using the warp merino; that area took up the dye more readily. These samples were still very wet when I shot them.
Oh, I also made some wool wash solution with my
soap nuts.
.JPG)
Now a bad day over all. I wished every day could be productive like today. Now I've got to think about dinner, and at bedtime, I shall finish India Flint's dye book.
Over and out.
PS. Totally forgot about the opening until Ben rang to ask if I were going; clearly it was too late by then.
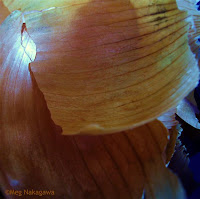
 The contrast and colors are exaggerated in this one.
 (To be honest, I think I can see the diamonds better in the photo posted on Tuesday. They show up better in photos than in real life, that's for sure.)
 * * * * *


 One of my favorite set of visual clues tie in with blotch marks I made with Japanese calligraphy ink and Q Tips. I don't like polka dots, but I love these.
 About a month ago I discovered to my detriment
  I wove until I couldn't see well, and then had a long bath and ample green-lipped-mussel soft-tissue serum, then to bed.
 Friday morning, I delivered. But my body was hurting.


