 Theoretically, all I need to do is to wind handles attached to the back beam so the warp threads in the warp chain is straightened and wound on to the back beam, which can later be wound forward under tension to be woven. The reality is, warp yarns can get tangled with each other, the threads may be unevenly tensioned, or depending on the type of threads, it can get tangled up with the heddle, and even break, so the winding needs to be done under vary careful and as many watchful eyes as possible. This is the only part of weaving that I really dislike.
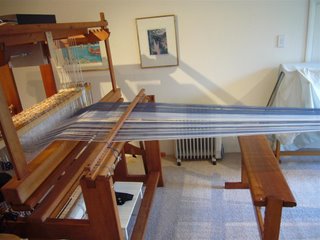 But I must wind to weave, so I attached a raddle on the front beam which allowed me to spread the warp relatively evenly to the width of the shawl; Ben held the warp chain, which was gradually undone by him and the threads held under even tension, at the other side of the room, as I slowly wound the warp.
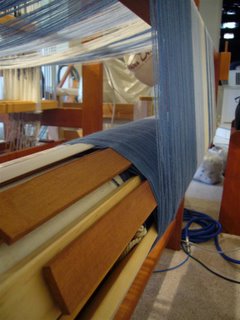 I must have taken this from where I was kneeling while Ben was resting his arms because the warp threads are slack; we watched the back beam, above and below the threads, the front and the back of the heddles and the front and back of the raddle for loose or tangled warp threads. The slats of wood and old plastic Venetian blinds help separate the different layers of warp threads.
We stopped winding when I had about 40cm left in front of the raddle; Ben left the rest of the warp threads hanging and I came to the front of the loom. I removed the raddle, and inserted a 6-dent reed. The reed spreads the warp threads evenly in the exact weaving width; I am using a 6-dent reed, which has six slots for every inch.
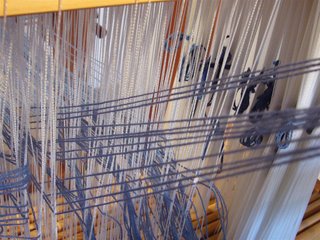
 I wanted to weave this shawl at 18 ends (warp threads) per inch, so threaded three threads in every slot. When I weave, the bars in the reed helps me push the weft threads forward and into position.
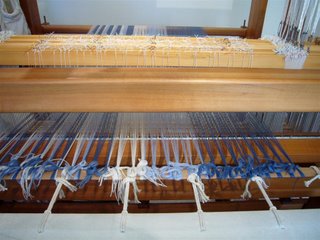 The winding took about an hour; the threading through the reed about another hour. Now I can tie the warp threads on to the front beam, and start weaving. Because I was not happy with the unevenness of the tension, I tied the warp threads directly, tugging at some sections more than the other, fine-tuning the tension.
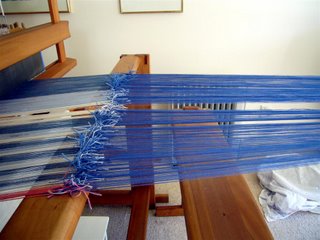 PS. A week later, I tied each new warp thread of the second warp onto the ends of the first warp, thus eliminating the need for threading through the heddles or the reed; the tying took me almost half a day, but this was still a great time-saver. I increased the number of warp threads slightly, so you can see the very long pink leaders, reaching all the way to the back beam, to make up the difference. The second warp is the more intense mid-blue only.
6 comments:
wowsers..
is very well could be just me...
I find it kinda funny ... my computer and my loom have ONE thing and only one thing in common... both are laptops ;)
what an interesting process you have there!!!
You could say, Jenni, I sit on the lap of this monster!
But then, Jenni, with looms, size doesn't matter!
I am a newbie to weaving...a couple of years but was taught to put my warp on front to back...it gets wound on the back beam before going thru heddles and the reed...I think I will need to plan a project to try it your way. Thanks for the great description.
SeaBee Mom, hello. There are advantages and disadvantages to all methods of winding, I understand. I also wind differently on different looms and how I feel like on the day. As well, I'm extremely limited for space on the back of the loom as well on the right (all the handles and brakes) side on the big loom, while the smaller looms I can move them around.
Do try different ways. You might even come up with a unique SeaBee way!!
oh yes, this is a trick my friend Eleanor uses when she wishes to dress a loom using the same threading sequence as the project before it. Smart!
btw if you cannot tell, I am catching up on your blog!
Post a Comment